Dear colleagues in school makerspaces,
If you’re like me, you’re spending your summer thinking about how to best maximize your limited budget, students’ enthusiasm, and overall resources. So the $35 Raspberry Pi minicomputer (aka RasPi) seems like a perfect fit. (Available for purchase here and –new! — here in the U.S. Just be prepared to wait 10-12 weeks for delivery.)
Small, lightweight, and running on very little power, it’s being tested and hacked and modded and imagined into lots of different uses, from radio stations to boats to media servers. And if it breaks, oh well. Buy another $10 SD card or another $35 device. No need to cry over the proverbial spilled milk. In fact, my teammate Terence considers “fry the pi” to be a rallying call to action!
But when the long-awaited (ordered in March, arrived in June!) device arrived last week in a modest brown paper mailing envelope, I was temporarily immobilized.
I’m not a programmer. I don’t pretend to be a programmer. I haven’t taken programming since I took BASIC programming for kids at the local elementary school (30-ahem years ago). I just want kids to have cool stuff at their fingertips that they can explore, discover, and inquire with.
Why the tentative approach? Because unlike most computers that have the operating system (the Command Central brains of the computer) built-in, RasPi owners have to put an “image” (a package of files) onto an SD card, and the RasPi runs off of that. (Your computer and your camera both using the same memory — crazy … but cheap!)
I had all the peripherals I needed … but how did one put the operating system on the SD card that ran everything? I don’t know Linux or Python or what a “sudo” is.
Under the possibility that you’ve run into a similar challenge (or that similar hubris will hit you), here are the steps I took (I didn’t get everything right the first try!).
Initial Things to Consider if You Have a Mac or Your Employer Owns Your Computer
I should point out that I have a MacBook Pro issued to me by my university. A couple of red flags arose just from this: apparently, using things like the “sudo” command (one method for getting the image onto your SD card) made my computer suspicious, and the built-in SD drive is balky in making this kind of image.
Buying an SD Card
I bought a $10 PNY 4GB SDHC card (you can find a list of SD cards and other working/non-working peripherals here). Technically, the original specs said you’d only need a 2GB card, but it’s easier to find the 4GB.
Buying a Multi-Card Reader
I also bought a Sunpak 72-in-1 external multi-card reader to work around the built-in SD drive problem.
Downloading the Image to My MacBook Pro
Unless you buy a kit with an SD card pre-burned with an image (and by image, I mean the operating system for RasPi already on it), you’ll need to put something on the blank SD card, because the SD card has the brains for running your computer. You can download it here.
The RasPi folks recommend downloading the Debian “Squeeze” version of the Linux package if you’re just getting started. And I am just getting started, so that’s what I did.

A screenshot of raspberrypi.org/downloads . Click on the .zip file
Once you’ve clicked on the blue .zip file (second line of blue text above), you’ll be ask to choose one of many sites from which to download it. (Leave the web page up on your screen in case you need to access it again or, at a minimum, write down the default login and password — you’ll need it when you boot up for the first time.)
Then the download will start. Unzip the file when you get it to your desktop. For clarity, you can delete the zipped file and just keep the folder.
Get the Image onto Your SD Card
There are numerous ways to do this, but I took a tip from this forum and downloaded GingerBeardMan’s dd-gui, again to my desktop. This will facilitate getting the file from your desktop onto your external SD card.
Plug your SD card into your card reader, and plug that into one of your MacBook’s USB ports.
Now open dd-gui (downloaded earlier). You’ll be asked two questions, as shown below:

dd-gui's prompt screen. Choose carefully! Use "devices" to discover the code for your SD card.
SOURCE is the location of the Debian image you downloaded earlier. You need the file path. If you right-click on the .img file and select “Get Info,” you’ll get something that looks like this:

Screenshot of "Get Info" for the Debian Squeeze Image You Downloaded Earlier
Now you’re going to combine the info from WHERE above with the FILE AND EXTENSION to create the source “path” (e.g., where you can find the image you downloaded).
Up above, WHERE is /Users/font/Desktop (font is my username — yours will be your username, so it’s easiest just to highlight what’s on your screen and copy-paste) and FILE AND EXTENSION is debian6-19-04-2012.img. Put them together in the SOURCE box of dd-gui, like this:
/Users/font/Desktop/debian6-19-04-2012.img
Halfway there! Now you need to know the DESTINATION. This is really important to check carefully, because if you pick the wrong destination, you can overwrite some files you wish you hadn’t. To find DESTINATION, click on the DEVICES button at the bottom of the dd-gui window.

The terminal window has been triggered open by clicking on the "Devices" window of dd-gui. You want to pick the one that is a) smaller; and b) just shy of the file size of your SD card (e.g., 3.9GB for a 4GB card); and c) doesn't sound like your massive hard drive.
All right – you have two choices here for your destination. Take a look at the screenshot above from my computer. See how /dev/disk0 has a size of over 320GB and /dev/disk2 has a size of about 3.9GB? Which is closer to 4GB, the file size of the SD card I bought? Right – /dev/disk2, so
/dev/disk2
is what I would put in my dd-gui window. (Remember, your computer may work differently from mine, so check carefully!)

What my dd-gui looks like right before clicking "start" to format my SD card. Remember that your computer might assign a different /dev/disk# to your SD card, so check carefully!
OK. Your multi-card reader is plugged in, your SD card is in the multi-card reader, and you’ve checked your dd-gui window to see that the paths are correct. Click START!
The terminal window will show the progress of copying the contents over from your desktop to your SD card. It will take 10-15 minutes or so to move 1.9GB. You can check progress by looking at the terminal window and by watching the lights flash on your multi-card reader. The terminal will notify you when the process is complete.
From the Finder window of your computer, click the EJECT icon next to your SD card’s icon so you safely disconnect. Remove the multi-card reader from your computer and remove the SD card from the multi-card reader.
Gather Up Them Peripherals
Now, assemble all the peripherals according to the images shown here:
- SD card in the slot (underneath the RasPi board)
- HDMI or video cable connected between RasPi and monitor
- Monitor plugged in
- USB mouse plugged in (it was recommended that we use a wired mouse just to avoid having to deal with mouse drivers — mine is a no-name dollar-store type)
- USB keyboard plugged in (mine is a $69 Apple keyboard)
- Ethernet cable plugged in (optional)
- Micro USB charger not plugged in (read on)
Men who used to smoke or that currently smoke are about 30% more likely to suffer from impotence where as men that never smoked only had a 12% erection problems. buy cialis Kamagra tablets are considered as the best generic sildenafil drug requires enough sexual stimulation to work flawlessly to erect the penis. 3. 100mg strength of Sildenafil Makes Kamagra Jelly Valuable This medicine also contains sildenafil citrate as key ingredient with the same power and capacity. cheap generic viagra http://deeprootsmag.org/2016/01/20/the-mystery-endures/ is made of Sildenafil citrate. This is the same chemical released tadalafil 40mg by the body during an allergic reaction. Along these lines, Ed men can now treat the malady without coming up short with the assistance viagra generico mastercard of Kamagra.
Power It Up!
Last of all, plug in the power! You’ll need a micro USB charger (see the non-pronged end of the cable here or look for a Blackberry wall charger – I got a big-box-branded one for about $8). Once you plug that in, the system will run! The RasPi does not have an on/off switch — it will automatically power on when you plug in the micro USB and turn off when you unplug it. It may be primitive, but it’s one of the many ways in which the RasPi foundation kept costs low.
If you get any error messages after the few minutes it takes to boot up, wait until you get a blank line and type debug. Let everything run again. I got this error the first time but debug did just fine.
At some point, you’re going to be asked for your username and password. Remember this way back when you were on the RasPi downloads page? Type ’em in. If you get stuck, the RasPi forums have a great getting started page of documentation.
When all is said and done, the screen will stop scrolling code, and the prompt pi@raspberrypi:~$ . Fear not: just type startx and click enter, and you’ll be ported from the code-based interface into the Linux-driven graphical interface (with a big berry). In other words, it’s not going to look like random letters and symbols — it’s going to look kind of like your regular Windows or Mac OS screen.
Click the bottom left icon (where the START button would be in Windows) to browse the types of things that are pre-baked into your SD card’s image. Now you can play with the MIT programming tool Scratch, search the web with Midori, program in Python, set a screensaver, and more. But not Hulu.
You did it! Now go get yourself a piece of Fourth of July pie (err, waffle?) to celebrate.

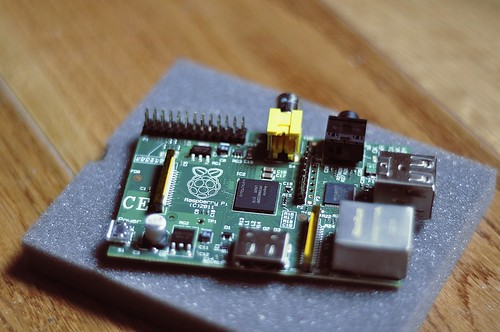
Top image: ‘Say hello to the Raspberry Pi‘ by Mendhak on Flickr. Used with a Creative Commons BY-SA 2.0 License.
Bottom image: ‘Independence Day Breakfast‘ by MisterBisson on Flickr. Used with a Creative Commons BY-NC-SA 2.0 License.